Hey there! As a water meters supplier, I often get asked about how to install an electromagnetic water meter. Well, you're in luck because I'm gonna walk you through the whole process step by step.
Why Choose an Electromagnetic Water Meter?
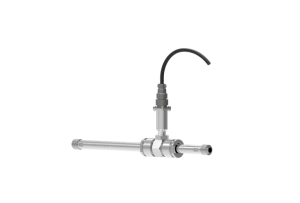
First off, let's talk a bit about why electromagnetic water meters are so great. These meters work based on Faraday's law of electromagnetic induction. They're super accurate, have no moving parts (which means less wear and tear), and can handle a wide range of flow rates. Whether you're dealing with clean water, wastewater, or even some mildly corrosive liquids, an electromagnetic water meter can get the job done.
Tools and Materials You'll Need
Before you start the installation, make sure you have all the necessary tools and materials. Here's a quick list:
- An electromagnetic water meter, of course.
- Wrenches for tightening the connections.
- Sealants or gaskets to ensure a leak - free installation.
- A pipe cutter if you need to cut the existing pipes to fit the meter.
- Electrical wiring and connectors if the meter requires power.
Step 1: Choose the Right Location
The first step in installing an electromagnetic water meter is finding the perfect spot. You want to pick a location where the flow is stable and fully developed. Avoid areas near bends, valves, or pumps because these can cause turbulent flow, which will mess up the meter's accuracy.
The ideal location is at least 5 - 10 times the pipe diameter upstream and 2 - 5 times the pipe diameter downstream of any flow - disturbing elements. Also, make sure the location is easily accessible for maintenance and reading the meter.
Step 2: Prepare the Pipes
Once you've found the right location, it's time to prepare the pipes. If you need to cut the pipes to fit the meter, use a pipe cutter to make a clean, straight cut. Make sure the ends of the pipes are smooth and free of any burrs or debris.
Next, clean the inside of the pipes thoroughly. You can use a pipe brush or a cloth to remove any dirt, rust, or scale. This is important because any debris inside the pipes can damage the meter or affect its performance.
Step 3: Install the Meter
Now it's time to install the meter. Carefully place the meter between the two prepared pipe ends. Make sure the meter is aligned properly with the pipes. You may need to use a level to ensure it's straight.
Once the meter is in place, attach the gaskets or apply the sealant to the pipe flanges. Then, use wrenches to tighten the bolts evenly. Don't over - tighten them, as this can damage the gaskets or the meter itself.
Step 4: Connect the Electrical Wiring
Most electromagnetic water meters require power to operate. If your meter is one of them, you'll need to connect the electrical wiring. Follow the manufacturer's instructions carefully to ensure the correct wiring.
Typically, you'll need to connect the power supply, ground wire, and any signal wires. Make sure all the connections are secure and insulated to prevent any electrical hazards.
Step 5: Test the Installation
After you've installed the meter and connected the wiring, it's time to test the installation. Turn on the water supply slowly and check for any leaks around the meter connections. If you find any leaks, tighten the bolts a little more or re - apply the sealant.
Next, check the meter's display to make sure it's working properly. You should see a reading that corresponds to the flow of water through the pipes. If the meter isn't working or the reading seems off, double - check the wiring and the installation to find the problem.
Related Products
If you're interested in other types of water meters, we also offer some great options. For example, the FT102 Two - channel Ultrasonic Flowmeter is a fantastic choice for measuring the flow of liquids in various applications. It's highly accurate and easy to install.
Another great product is the Portaflow FT221. This portable flow meter is perfect for on - the - go measurements and can be used in a wide range of industries.


And if you're looking for a thermal mass meter supplier, we've got you covered. Check out our Thermal Mass Meter Supplier page for more information.
Conclusion
Installing an electromagnetic water meter isn't that difficult if you follow these steps. Just make sure you choose the right location, prepare the pipes properly, install the meter correctly, connect the wiring, and test the installation.
If you have any questions or need help with the installation, don't hesitate to reach out. We're here to support you every step of the way. Whether you're a professional plumber or a DIY enthusiast, we can provide you with the best water meters and the knowledge you need to get the job done right.
So, if you're in the market for a high - quality water meter, we're the supplier you can trust. Contact us to start a procurement discussion and find the perfect water meter for your needs.
References
- "Electromagnetic Flow Meters: Principles and Applications" by Instrumentation Tools
- Manufacturer's installation guides for electromagnetic water meters