


Installing a vortex meter in a small - diameter pipeline requires careful planning and precise execution. As a vortex meter supplier, I've witnessed firsthand the importance of a proper installation to ensure accurate flow measurement and long - term reliability. In this blog, I'll guide you through the step - by - step process of installing a vortex meter in a small - diameter pipeline.
1. Pre - installation Preparation
Before you start the installation, it's crucial to gather all the necessary tools and materials. You'll need a pipe cutter, pipe wrenches, a level, sealing tape, and of course, the vortex meter itself. Make sure the vortex meter is the right size for your small - diameter pipeline. Check the specifications provided by the manufacturer to ensure compatibility.
Inspect the pipeline thoroughly. Look for any signs of damage, corrosion, or blockages. Clean the pipeline if necessary to ensure a smooth inner surface. This will help the vortex meter function optimally. Also, measure the pipeline's inner diameter accurately to confirm that the vortex meter will fit snugly.
2. Shutting Down the System
Safety should always be your top priority. Before beginning the installation, shut down the system and isolate the pipeline section where you'll be installing the vortex meter. Close all relevant valves to prevent the flow of fluid. Release any pressure in the pipeline by opening a bleed valve. This will protect you from potential injuries during the installation process.
3. Cutting the Pipeline
Use a pipe cutter to cut the pipeline at the appropriate location. The location is crucial for accurate measurement. Generally, it's recommended to install the vortex meter in a straight section of the pipeline. The straight section should be at least 10 times the pipe diameter upstream and 5 times the pipe diameter downstream of the meter. This helps to ensure a stable flow profile.
Make sure the cut is clean and straight. Use a deburring tool to remove any rough edges or burrs from the cut ends of the pipeline. This will prevent any interference with the installation of the vortex meter.
4. Installing the Vortex Meter
Now it's time to install the vortex meter. Apply sealing tape to the threaded ends of the meter or use a gasket if the meter has flanged connections. Carefully insert the vortex meter into the cut section of the pipeline. Align it properly and make sure it's level. Use pipe wrenches to tighten the connections, but be careful not to over - tighten as this could damage the meter or the pipeline.
5. Connecting the Electrical Wiring
Most vortex meters require electrical connections for power and signal transmission. Follow the manufacturer's wiring diagram carefully. Connect the power supply wires to the appropriate terminals on the meter. Also, connect the signal wires to the control system or data acquisition device. Make sure all connections are secure and insulated to prevent electrical hazards.
6. Testing the Installation
Once the vortex meter is installed and the electrical connections are made, it's time to test the installation. Slowly open the valves to allow fluid to flow through the pipeline. Check for any leaks around the meter connections. Monitor the meter's display or the data received by the control system to ensure that the meter is functioning correctly.
If you encounter any issues during the testing phase, such as inaccurate readings or leaks, troubleshoot the problem immediately. Check the connections, the alignment of the meter, and the fluid flow conditions.
7. Calibration
After a successful installation and testing, calibration is essential to ensure accurate flow measurement. Calibration should be performed according to the manufacturer's recommendations. This may involve using a reference flow meter or following a specific calibration procedure.
Calibration ensures that the vortex meter provides reliable and accurate data, which is crucial for process control and billing purposes.
Advantages of Our Vortex Meters
Our company offers a wide range of high - quality vortex meters suitable for small - diameter pipelines. These meters are designed with advanced technology to provide accurate and reliable flow measurement.
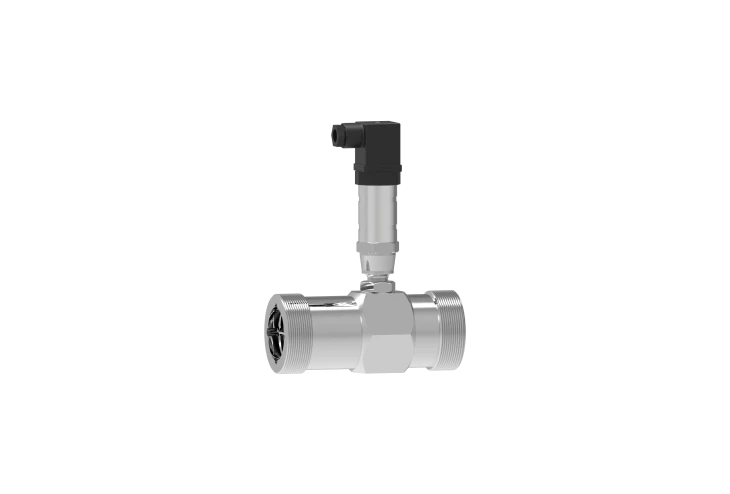
For example, our Sanitary Hersman Liquid Turbine Flowmeter is perfect for applications where hygiene is a concern. It's made of high - quality materials that are easy to clean and maintain.
Our High Temp Insertion Vortex Flow Meter Transmitter Fit for Steam Measurement is designed to withstand high temperatures, making it ideal for steam applications. It provides accurate measurement even in harsh environments.
The Good Performance Vortex Flow Meter for Steam with Calibration Using In High Temperature is another excellent option. It offers good performance and is calibrated for high - temperature steam measurement, ensuring accurate and consistent results.
Contact Us for Purchase and Consultation
If you're interested in purchasing a vortex meter for your small - diameter pipeline or need more information about installation and calibration, we're here to help. Our team of experts can provide you with detailed product information, technical support, and assistance with the installation process.
Contact us today to start a conversation about how our vortex meters can meet your flow measurement needs. We look forward to working with you to ensure the success of your project.

References
- Flow Measurement Handbook: Principles and Applications, Third Edition, by Richard W. Miller.
- ASME MFC - 7M - 2017, Measurement of Fluid Flow in Closed Conduits Using Vortex Meters.


