Hey there! As a supplier of BTU meters, I'm stoked to share with you how to install a BTU meter in a residential property. It might sound a bit technical, but trust me, with the right steps, you can get it done without too much hassle.
What's a BTU Meter Anyway?
First off, let's quickly talk about what a BTU meter does. BTU stands for British Thermal Unit, and a BTU meter measures the amount of heat energy transferred in a heating or cooling system. In a residential setting, it helps you figure out how much energy your HVAC system is using, which can be super useful for keeping track of your energy consumption and costs.
Tools and Materials You'll Need
Before you start the installation, make sure you've got all the necessary tools and materials. Here's a list to get you started:
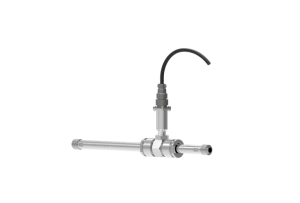
- BTU meter kit (obviously!)
- Pipe cutter or saw (depending on the type of pipes you have)
- Wrenches (various sizes)
- Teflon tape
- Screwdriver
- Electrical tape
- Drill (if you need to mount anything)
Step 1: Choose the Right Location
The first step is to find the perfect spot to install your BTU meter. You want to pick a location where the flow of the fluid (usually water) is stable and representative of the overall system. A good rule of thumb is to install it on a straight section of pipe, away from any bends, valves, or other disruptions. This will ensure accurate measurements.
Also, make sure the location is easily accessible for maintenance and reading the meter. You don't want to have to crawl into a tight space every time you need to check it.
Step 2: Prepare the Pipes
Once you've found the right location, it's time to prepare the pipes. If you're installing the meter on a new system, this might be as simple as cleaning the pipes and making sure they're free of debris. But if you're retrofitting an existing system, you might need to cut the pipes to make room for the meter.


Use a pipe cutter or saw to make a clean cut in the pipe. Make sure the cut is straight and the edges are smooth. Then, use Teflon tape to seal the threads of the pipes where the meter will be connected. This will prevent any leaks.
Step 3: Install the Flow Sensor
The flow sensor is a crucial part of the BTU meter. It measures the flow rate of the fluid in the pipes. To install it, you'll need to follow the manufacturer's instructions. Usually, it involves clamping the sensor onto the pipe or inserting it into a specially designed fitting.
Make sure the sensor is installed in the correct orientation. Most sensors have an arrow indicating the direction of flow. If you install it backwards, you won't get accurate readings.
Step 4: Install the Temperature Sensors
Next, you'll need to install the temperature sensors. These sensors measure the temperature of the fluid entering and leaving the system. They're usually attached to the pipes using adhesive or clamps.
Again, follow the manufacturer's instructions carefully. Make sure the sensors are installed in the right locations and are in good contact with the pipes. This will ensure accurate temperature measurements.
Step 5: Connect the Wires
Once the sensors are installed, it's time to connect the wires. The BTU meter usually comes with a wiring diagram that shows you how to connect the sensors to the meter. Make sure you follow the diagram exactly to avoid any electrical problems.
Use electrical tape to secure the connections and prevent any short circuits. Also, make sure the wires are routed in a way that they won't be damaged by moving parts or other hazards.
Step 6: Mount the Meter
Now that all the sensors are connected, it's time to mount the meter. Most BTU meters can be mounted on a wall or a panel. Use a drill and screws to secure the meter in place.
Make sure the meter is mounted at a convenient height and angle for easy reading. You might also want to consider installing a protective cover to keep the meter safe from dust, dirt, and other elements.
Step 7: Test the System
Once the meter is installed, it's time to test the system. Turn on the HVAC system and let it run for a few minutes. Then, check the meter to make sure it's working properly. You should see readings for the flow rate, temperature, and BTU consumption.
If you notice any problems, such as incorrect readings or leaks, stop the system immediately and check your installation. Make sure all the connections are secure and the sensors are installed correctly.
Step 8: Calibrate the Meter
After testing the system, you might need to calibrate the meter to ensure accurate measurements. Calibration involves adjusting the meter to match the actual flow rate and temperature of the system.
Most BTU meters come with a calibration procedure that you can follow. It usually involves entering some known values into the meter and adjusting the settings until the readings match.
Step 9: Maintenance and Monitoring
Once your BTU meter is installed and calibrated, it's important to perform regular maintenance and monitoring. Check the meter periodically to make sure it's still working properly. Look for any signs of wear or damage, such as loose connections or cracked sensors.
You should also keep track of the energy consumption readings over time. This will help you identify any trends or changes in your energy usage and take steps to reduce your costs.
Conclusion
Installing a BTU meter in a residential property might seem like a daunting task, but with the right tools, materials, and instructions, it's definitely doable. By following the steps outlined in this blog post, you can ensure accurate measurements of your energy consumption and take control of your energy costs.
If you're in the market for a BTU meter or need more information about our products, Fluid Flow Meter is a great option. We also offer the New Design Wall-Mount Clamp- On Type Ultrasonic Flow Meter and Mag Flow Meter Manufacture. Don't hesitate to reach out to us for more details and to discuss your specific needs. We're here to help you make the best choice for your home.
References
- Manufacturer's installation manuals for BTU meters
- HVAC system installation guides
- Energy efficiency standards and regulations